Thursday, December 13, 2012

A Stranger to My Blog

It has been a loooong time since I have posted anything here! I suppose it's because I have been busy trying to build my business, but also because blogging can be a little tedious at times, and time-consuming! Taking photos, editing photos, writing posts, editing posts, etc., it all takes time that I could be spending on something else. But I am making a vow to myself to start blogging more; at least once a week is my goal.

A little update on what has been going on. In addition to being home with my 3yo, and trying to build a business, I am babysitting from my house a few days a week too. I am also trying to keep busy making the rounds at local craft fairs. I have been to two in the past couple of months, and both were mild successes.


I have also opened up a second Etsy shop. I wanted to keep the number of listings in my shop down, so I decided to separate my items for women from those for girls and teens. Women's items, including those shown below, can be found at Betty Bow Blue.

Button Bracelets-$18 (Available in various styles)

Poppy Earrings-$12 (Available in gold, white, purple, pink, green, and red).

Poppy Rings-$9 (Available in green, red, white, purple, light blue, and gold)

Fabric Pom Rings-$12 (Available in various colors and prints)

Vintage Rings made from re-purposed clip-on earrings- $15-$22.50


Items for girls and teens can be found in my new shop, Betty Bow Blue, too! Here you will find my popular padded headbands, and various hair accessories, including hair clips, headbands, and hair ties. Here is a selection of some items available (or available soon).

Headband Holders-$25

Bubble Puff Headbands-$9-$11

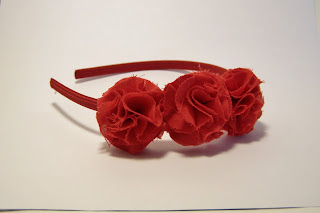
Felt Flower Headbands- $9 (Available in fuchsia, red, and purple)

Felt Flower Hair Clips-$4.50 (Available soon)

What does the future hold for Betty Bow Blue? Hopefully some more business! I have also been thinking of getting into the "wedding scene", as my sister says. I have already sold a bunch of poppy rings as bridesmaids' gifts this past fall, and I have another bridal order set for next year.

I am finally starting to figure out what works and what doesn't, what sells and what doesn't. I will definitely be continuing with the headband holders, but some items may only be available at craft shows, as they seem to sell better there than online. Either way, 2013 will probably see a few changes with Betty Bow Blue. You will have to stick around to find out!

Thursday, March 15, 2012

Headband Holders

Selection of headband holders that I made for a recent craft fair. Headbands fit snugly around the padded base. Two ribbons for attaching hair clips. Lids remove for extra storage inside. Custom orders are currently on hold unless a canister can be provided.

I still have the black & white damask, blue & yellow argyle, and ladybug ones in stock. Have enough fabric to make one more of the rest, among other designs and colors. $25 (+tax in NY). $20 if a container is provided. Read a little more about them HERE.
1. Black & white damask 2. Blue & yellow argyle 3. Polka dots 4. Retro Round 5. Happi Medallions 6. Ladybug Graden 7. (No longer available).
(The purpose of this post was really to give Allison an opportunity to "pin" this to her Pinterest. :-) You can follow her on Pinterest. And while you're at it, follow me too!

Happy pinning!

Saturday, February 4, 2012

To Makeover or Not to Makeover?

I've been thinking of giving Betty Bow Blue a mini-makeover. I was printing out my own business cards and packaging, but quite frankly cutting out each one got a little old. I ordered new business cards, with a new logo on them, and would like for everything (cards, packaging, Etsy shop, etc.) to be cohesive.

New business cards
I chose my original image because one of my sisters thought that everything should have a 40s vibe to it because she felt that my products evoked that feeling. The newer image is more modern. Which do you like better? Should I stick with the old one or welcome the new? (See poll on the right sidebar).

Etsy banners:
Old
New
Logo:
Old
New

Opinions?

Sunday, January 29, 2012

New Headband Holder

I know that I haven't posted the survey results for the headband holders yet, but I wanted to share one that I made today. I wasn't really planning on starting these already, but I had received two requests through Facebook for one. Then I found out that there is an upcoming craft fair in town that I am trying to sign up for (waiting for the woman in charge to email me back). So I decided to make some of these earlier than planned in anticipation for the craft fair (on February 18th).

I prepared all of my materials the last night:
I had high aspirations of finishing two of these today.
And impatiently waited until naptime today to "whip" one up.

Here is the first one that I have made up (excluding my "mock-up" that was shared in the survey):
The blue fabric is for the next one.
This darn thing took me about TWO hours to finish! And that's not including the time that it took me to measure and cut the fabric and the batting the night before.

I'm not really sure if I like how this one turned out. The pom fringe doesn't really look how I had pictured it would, and I think it might be a little overkill once headbands and hair clips are added. There is a dark purple in the fabric, which coordinates with the ribbon and fringe, but it's a little difficult to see in this photo. There are two hair clip ribbons on this one (the consensus from the survey was to have two), and the padded lid removes for extra storage inside, for hairbrushes, combs, hair ties, etc.:
Tabs inside prevent it from falling inside the container.

I am still debating whether or not I want to try to track down some bases for these, as shown in the mock-up, using one of my votive bases:

What do you think, don't worry about a base, or definitely include one? Ditch the pom fringe, or keep it?

Friday, January 27, 2012

A Farewell to Bethany

It is with a heavy heart that I announce the loss of "Bethany", a beloved member of the Betty Bow Blue family.

You will be missed.
With one final snip of the scissors, Bethany was no more. She had a good run while it lasted, and was a favorite of many. Throughout her lifetime, Bethany was able to produce a pair of hair clips, two flower headbands, a flower pin, two pom pins, FOUR necklaces, and most recently, two pom rings. She was a bestseller.

If you are one of the unfortunate few who do not own a piece of Bethany, now's the time to act! One pom pin, and one pom ring (see photo below), are still available for purchase. Move quickly before she is gone completely!

For now, let's take a moment of silence to remember the best of Bethany:

And for the record, yes, I am fully aware that I am a dork. :-)

Thursday, January 19, 2012

Ring Survey Results

33 people completed this survey:

1. Which size would you prefer?

  • The 1 1/4" pom (tan)- 30.3% (10)
  • The 1" pom (gold)- 60.6% (20)
  • Neither- 9.1% (3)
  • Other: "I prefer the smaller one, but like them both... very cute."
2. Which ring base would you prefer? (This question was added later, so there are only 19 responses)
  • An adjustable metal base- 63.2% (12)
  • Elastic- 15.8% (3)
  • Either- 21.2% (4)
3. Which metal ring base would you prefer? (Select all the apply)
  • Antique silver- 24.2% (8)
  • Gold- 12.1% (4)
  • Antique bronze- 27.3% (9)
  • Silver- 30.3% (10)
  • Any, depending on the color of the pom- 42.4% (14)
4. Solids or prints? Cool or warm colors? Etc.
  • Answers for this question were pretty much all over the place, as was expected. There was a good mix of responses for just about all colors and prints/solids. A couple of people brought up some questions/suggestions in this section, which I will address later.
5.  Min/max price range that you would pay for this ring:
  • The majority of the responders agreed with the $6-$8 price range that similar rings are being listed for on Etsy. (I say similar rings because I have yet to find any listings on Etsy for a fabric pom ring like this one. The closest that I can find are either cabochons or yarn poms). A few people suggested $5-$7, while others went as high as $10-$15! The lowest suggestion was $2! (Which I'm hoping was a typo, because that is less than it costs me to make these!). 

Someone mentioned to me that they would have liked to have seen an "Additional Comments" on the surveys, which I agree would have been great, however, I was limited to a certain number of questions, and that included the photos. Fortunately, a few responders took advantage of the "other" answer options, or the places where you could type in your response, and used that to voice a few concerns and suggestions.

A couple of responders mentioned "full" vs. "less full" poms. The poms that I intend to make for these rings will be fuller than the two shown. I just whipped up those two in a hurry so I could have photos for the surveys. Another responder wanted to know how I would keep the rings from fraying, which is a legitimate concern. The poms will be sealed around the edges to help prevent fraying, I just didn't waste the time to do that with my sample rings. A third person suggested that I make fabric button rings, using leftover buttons from the bracelets. While this is a great suggestion, if I do make some, then I will probably limit them to craft fairs, as the fabric button rings are everywhere on Etsy!

My bases for the rings arrived last week, so I will probably get started making some soon. I am delighted to say that I have already received an order for a ring! Someone saw a similar ring on a television show recently, fell in love with it, and has asked me to make her one. I will be picking up the fabric on Saturday, (as she has requested a color that I didn't have on hand), and will let you all know how it turns out! (Thanks again, L!)

Feel free to contact me (via email or Facebook) if you would also like to put in a request for a custom order, or if you have any other questions about them. I am headed to the fabric store on Saturday to restock a few supplies, so if anyone wants one in a color that I don't have, I will have to pick it up then. (I don't get to the store often, so I have to get everything at once).

Thank you again to everyone who responded to the survey! All feedback was appreciated.

First Custom Order

Recently one of my sisters asked me to make a REAL custom order, (as opposed to asking me to make a duplicate of an item that I've already made). She wanted hair clips to match a dress that she bought as a Christmas gift for two sisters. Here is what the dress looks like:
From JCPenney

I was actually pretty excited about doing this, and I love how the matching hair clips turned out. The sisters are 5 and 2, so I made two different sized poms for the clips, (a little difficult to tell in this photo).


The greens matched better in real life, the blue ended up being a little off from the actual blue in the dress, but I blame that on the photo from JCPenney, since they appear to be the same on my screen. :-) My sister also asked me for two headbands for each girl, which proved to be a little more challenging than one might think, but only because the girls have red hair, so I had to make sure I made something that would look well with red. I already had a couple of headbands on hand, but also came up with two new headbands:


Rumor has it that the girls loved the headbands, and one of them HAD to wear hers the rest of the day. That's what I like to hear!

I have created two tutorials while I was making these items, so I'll be sharing those some time later.

Friday, January 13, 2012

Shop Update

My Etsy shop is up and running again after some price revamping for that market, but don't balk at those prices just yet! Yes, they are higher, but remember that those prices are going to be different than my local/craft fair prices (which have also had a slight price adjustment to reflect time and materials). Anyone who placed a custom order with me prior to this price change will still be charged the old price. Also, contacting and buying from me directly, (not through Etsy) will result in a discounted price (from the Etsy prices), as explained in my earlier pricing post. No more losing money for me!

Here's a look at things to come in the next month or two.

Rings: I am awaiting a shipment of ring bases to begin working on those. (Survey results coming soon). You can expect to see some of those in my shop by the end of the month. Update: Ring bases arrived yesterday!

Bracelets: I am getting ready to place my order for bracelet bases and as soon as I receive all of the supplies for these, I should be able to start on those right away and have those in my shop by the end of January or beginning of February.Update: Supplies for bracelets were purchased today!

Headband holders: I will probably start making these in February (unless you contact me earlier for a custom order), as I have already had some interest in them. Canisters are being collected and the kinks are being worked out now. I don't know that I will be listing these in my Etsy shop, or just offering them through Facebook and personal sales.

Headbands: I have had several questions about headbands for infants, so I am now going to start offering crochet head wraps along with the elastic and fabric-wrapped headbands. These will be available for fabric flowers, 3" poms, and the "coming-soon" felt flowers. The fabric-wrapped plastic headbands that I usually use are starting to get a little difficult to find in different colors. This may mean that they are on their way out and will need to be replaced by something else, (another reason why I now sell my fabric flowers by themselves).

Felt Flowers: I really love the one I made, so I will be making these within the next month or so too. They will be available as pins, clips, and headbands. Flower designs will include dahlias and sunflowers, with the possibility of others.

I think that may be it for updates right now. Starting next week, I will be working two days a week (baby-sitting on Tuesdays and subbing on Fridays), so that will help move things along, I hope.

Thursday, January 12, 2012

Earring Survey Results

30 people responded to the earring survey, (and one silly goose who inadvertently skipped it).

Photo/Project Credit: Happy Together

1. Who do you think that earrings like these would be more appropriately targeted toward (Select all that apply)
  • Women- 30%- (9)
  • Teens- 50%- (15)
  • Young girls- 50% (15)
  • Other (6): "i would think high school, college, young adults would wear there, very cute!"; "tweens"; "Seniors, too."; "Young women-early 20's"; "Depending on the fabric color it could be for young girls too."; "While I think they would be most appropriate looking on younger girls, they also might not hold up on them."

2. If you were to wear these, or buy them for someone else, would you prefer solid, prints, pearls, beads, cool, warm, or neutrals? (FYI, I had to use this format for the question because I was only allowed to have 10 questions per survey and this one was part of the bracelet survey).
  • Answers for this question were all over the place, but the general consensus was that anything would go. Winner of the best feedback response was: "both solid and prints would work for me. again, if it is something like this that is a little out of the box for earrings-i think the women that would wear these would like fun colors and prints rather than neutrals. Pearls are beautiful, but if you had a sparkly tiny button that would be gorgeous too! Love sparkles."

3. The average min/max price range that people said that they would pay for these is $7.50-$10.30. $5 was the lowest price suggested and $15 the highest. Three people claimed that they would not buy them at all.

My MPW suggested the following: wholesale price- $6.54; "safe" price- $11.54; retail price: $13.08, which seems to have underestimated a bit? Originally, I was thinking of pricing these for a craft fair at $4.00 a pair! Seems as though I was underestimating what people would pay, too!

I would like to reply to a couple of feedback comments/concerns that I received regarding these earrings. Actually, I think it's only one comment. One responder who said that they would not buy these, explained, "The fabric looks [like] it will fray, and they look a little gaudy." To which my response is, to each his own. I would personally never wear these either, as I prefer my earrings to dangle a bit, but I know that there are some women out there who would.

The main reason that I was considering making these earrings when I came across them was because there were so many women at my last craft fair who were excited about my pom hair clips, thinking that they were actually earrings. They were disappointed to find out that they were in fact hair clips. I couldn't help thinking first, that the poms were much too large to be mistaken for earrings, (they are 1.5"-2" in diameter!) and secondly, how gaudy that would look, but again, to each his own. But then I started thinking, well what about a smaller version of the pom....

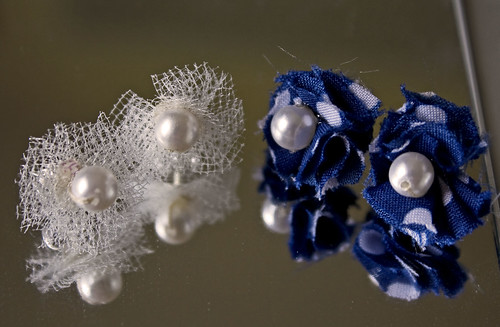
As far as fraying goes, I think that the natural fraying of the earrings in the photo from Happy Together, actually added to the charm of them, except maybe that long bit hanging out on the left side of the photo:

Photo/Project Credit: Happy Together
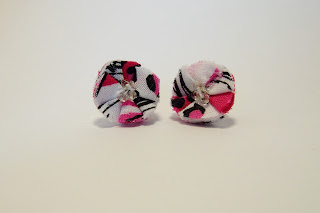
 However, I believe in selling a product that is going to hold up and not fall apart on my customer, so I was planning to seal the edges of the fabric before constructing the earrings. Which I did, with the second pair that I made:


I actually wasn't very crazy about how these turned out, nor was I satisfied with the whole process in general. Hand-sewing the tiny fabric pieces together was a pain in my tushy, and I am too much of a perfectionist to have them appear sporadically arranged and messy as they did in the original tutorial, (as seen in the blue earring on the far right):

Photo/Project Credit: Happy Together

So, all things considered, I concluded that I will not be making these earrings. I didn't really enjoy doing it, nor did I like the end result enough to want to make more. If I'm going to spend valuable time on an item, then I want to be able to be proud of it, regardless of whether or not I would wear it myself.

Thank you again to everyone for the wonderful feedback! Expect to see the ring and headband holder survey results within the next week, and if you haven't checked out the results for the bracelets yet, check them out here.

Bracelet Survey Results

Thank you again to everyone who participated in my marketing surveys. I really appreciate it! Overall, the feedback has been great, with maybe one or two questionable comments thrown in here and there.

I really wish I knew who responded with which answers, because a few of you went above what I expected to receive as far as feedback goes. Unfortunately, the survey results only tell me the city the responders are located near, so unless you are from somewhere other than NY (Ohio, Virginia, Maine, Maryland, Connecticut, etc...), then I have no way of knowing who you were. So please don't be offended if I don't offer up a personal thank you for replying!

But on to the results!

For the bracelet survey, 31 people responded:

Photo/Project Credit: The Mother Huddle

1. If you were to wear one of these bracelets, would you wear it in antique copper (shown), silver, or gold/brass? (Select all that apply).
  • Antique copper - 67.7% (21)
  • Silver - 67.7% (21)
  • Gold/Brass - 38.7% (12)
2. Which colors, (in print fabrics) would you prefer? (Select all the apply)
  • Blues -67.7% (21)
  • Purples- 58.1% (18)
  • Greens - 67.7% (21)
  • Reds- 45.2 % (14)
  • Oranges- 51.6% (16)
  • Yellows - 48.4 % (15)
  • Browns - 58.1% (18)
  • Pinks- 41.9% (13)
  • Other: "all colors"; "black and white (together)"; "mixed up palette"; "All"; "prints are cute"; "any fun color combos you come up with!"
(Note about this question: I have no idea why I didn't include blacks and grays, or neutral colors in with the responses. I meant to....)

    3. What min/max price range would you pay for one of these?
    • The average range of responses ended up being $14-$17.42, with $15-$20 actually being the price range given the most . The lowest suggestion was $9 (which no offense to the person who made that one, but it made me laugh because that wouldn't even earn me back my total cost to make the bracelets!), and the highest price given was $25.

    Someone brought up the issue of our county (St. Lawrence) being the poorest in New York, indicating that prices should be on the lower end of the price range to be able to sell in this area. As I stated in my previous post, I do agree with this, as far as selling at craft fairs goes. You really should consider your average customer when selling locally. However, when it comes to selling on Etsy, I do believe that I could sell these for prices at the higher end of the range without any problems.

    My "Magic Pricing Worksheet" (see previous post) is actually pretty spot on with what the feedback has been, (although I just realized that the price I entered did not include how much it would cost to ship the supplies to me). The suggested wholesale price is $20, "safe" price is $25, and the retail price is $40. (If you read my previous post about pricing, then you will understand what those mean. If you have not read my previous post, which based on the stats, most of you haven't, then shame on you. Go read it now).

    Overall, the response to these bracelets was all positive. There were a few very enthusiastic responses to this item, ("LOVE THIS BRACELET!!!! SO FUN!"), which was very encouraging. I am definitely going to be making this in the very near future, so watch out for them! The only thing that I am waiting on is my seller.

    I have not been able to find any of the bases that I will need for this bracelet locally, so I am ordering them online through Etsy. This specific design of bracelet base has been difficult to track down, and of the three (?) places that I have found it, the ones on Etsy have been the cheapest, and it's only available in the antique copper. Thankfully, I found them early, before anyone else did, because they are the only listing for these bases on Etsy. Unfortunately, the listing was only for two bracelets, and I definitely want more than that. Fortunately, this Etsy seller was kind enough to place the bracelets on reserve for me while he/she collected a few more on his/her restock days. I am assuming that he/she buys these locally at a supply store and then resells them, which is fine by me, because the price is still cheaper than anything I have been able to find elsewhere for them. These bracelets may be in limited supply because of this though, so when I do start making them, if you see one that you love, then you had better act fast! :-)

    How's that for a promotion strategy?

    Wednesday, January 11, 2012

    The Power of Pricing

    If anyone has happened to stop by my Etsy shop in the last day or so, you will notice that I am "On Vacation". I'm not really on vacation, (although after hearing the weather forecast for the rest of the week and weekend, I wish I were), I am making some much needed adjustments, and hopefully improvements, to my shop. Other than taking new photos using my photo box, I am also in the process of adjusting my prices. 

    I have been told by several people that they were surprised at how low I have some of my items priced. I have also been told that I am undervaluing myself. I rolled my eyes at them at first, but then I sat down and actually did the math, and after figuring in the fees that Etsy and PayPal charged me, I realized that I ended up losing money on my Etsy sales! Obviously, this is no way to run a business (unless I'm trying to run it into the ground), so I needed to make some changes.

    I enlisted the assistance of my fabulously helpful sister, and she directed me to what I will be referring to as the "Magic Pricing Worksheet", or MPW. Some brilliant person out there came up with an Excel worksheet (complete with formulas! No need for fingers and toes!) for dummies like me to help price their items. Prior to this, I was doing a lot of estimating, and basically pulling prices out of my tushy. Sure, I was looking around at similar items and what they were selling for, but basically my prices were guesstimates. (Side note, I find it interesting that Firefox does not recognize "tushy" as being a word, but it does "guesstimate").

    Basically, what the MPW does is calculate different prices based on cost of materials, overhead (which for the purposes of my business, includes the cost of packaging, printing, materials that I cannot really estimate for, like glue and thread, etc.), and labor. It gives you four price figures: your total cost, wholesale price, retail price, and a "Safe Price Range" . I love that it does this, because these three different prices are perfect for the various places that I could sell my products: craft fairs/personal sales, online venues like Etsy, or a "brick and mortar" storefront that sells items from local artisans.

    I don't know about other people who sell their crafts, but personally, I plan to have different prices for each venue. This may not sound fair, or the ideal way to conduct a business, but let me break down the reasons why. If I am selling my items at a local craft fair, then I need to be aware of who my customer is going to be, and most importantly, my location. Someone who is shopping around a craft fair in the boonies of Upstate New York is most likely going to spend less money on items than someone in New York City. Right? The typical craft fair visitor in my area is not going to be shelling out $30 for a felt flower headband, regardless of how well it is made or how much time has been put into it, (there are always some exceptions though). So ideally, my prices should reflect that if I want to make any sales and try to establish my business with "the locals", which I feel is an important thing to do when just starting out. As long as my prices are fair, and I'm still making money rather than losing money from these sales, then I see no reason why I can't sell them for less, using the wholesale price from the MPW.

    Now let's take a look at selling on Etsy, or other online venues. In case you were unaware of this, listing items on these sites is not free, nor is it free to sell them. Etsy charges a fee for each item that you list. After a certain period of time, (a few months), if your item has not sold, then you can relist the item, paying the fee again. Etsy also charges a fee for each sale that you make. They will charge you a (very small) % of the purchase price of the item, (does not include tax or shipping). Unfortunately, the fees do not end there. If your customer is using PayPal to pay for their order, which they most likely are, then PayPal will charge a fee based on the full amount of money received (including tax and shipping). This is a small %, plus $.30 for each transaction. So, with all of that in mind, items that I list on Etsy should be priced higher to help cover those charges.

    Another thing to consider when pricing these items is that Etsy has an International customer-base, which means a higher chance of reaching customers who will pay $30 for a felt flower headband (which they do). It would really be stupid of any seller not to take advantage of this, and this is where the middle "Safe Price" figure comes in handy.

    The retail price would most likely apply to items being sold in stores. Although I currently don't do this, there are several local stores/venues that sell items for local artisans, kind of like a consignment shop. My sister does this, and if I remember correctly, she has to pay a fee each year for her space in the store, and they also collect a 30%-40% commission from the items that she sells there. Obviously, this means that she has to price accordingly if she wants to make any money at all, hence a higher retail price.

    So with all of this in mind, last night I sat down with my receipts, (or at least the ones I had the foresight to save), and the MPW and got to work figuring out what I should be charging for my items. I calculated what it cost me to make each item, figured out how much time it took me to make each item, and plugged them into the MPW. Holy moly! What a difference in prices! I realized that the biggest difference in pricing my items was that I wasn't figuring in my time, the labor that it takes to make each item. Although, for some random reason I was doing this with my necklaces, but not my other items. Apparently I must think that 15 or 30 minutes of my time is worth less than one hour of it. In other cases, I underestimated how much it actually cost for the supplies to make certain items.

    One of the tips that I see over and over again regarding pricing, is that pricing your items low (thinking that they will sell better) will actually hurt your sales. Apparently when people see a product that is priced low, they assume that it is cheaply made; they are more likely to buy a similar item at a higher price. This makes absolutely no sense to me because I always shop around and compare prices for the biggest bargain. I am all about finding the best way to save money, not spend more of it. But speaking of comparing prices, I also learned that it's best not to price your items based on what others are selling similar items for. The main reason for this is because you really have no way of knowing how those people are figuring out their prices. They may not have as much time invested, or as many material costs.

    Overall, I think the biggest issue that I have to overcome is being able to appropriately value myself and my items. I often think, "Why would anyone pay that price for one of my items?". I guess I don't think that people actually consider the amount of time and work that I have invested in an item when looking at the price. They compare my products to similar items that they can find in the store, and think that I am overcharging for them. (I must assume that everyone is a bargain shopper like myself).  But here's the thing, yes, items in a store are going to be cheaper, there's no getting around that one. But in most cases, they are also cheaply made using cheaper products. I don't use prefabricated items for my products, (with the exception of the "hardware" like headbands and hair clips, but I challenge you to try to make those from scratch). I don't take a plastic or silk flower and simply glue it to a headband and resell it. I don't buy cabochons in bulk, glue them to a ring base that I have bought in bulk, and resell them. Each one of my flowers, each one of my poms, is unique. Each has been hand-cut, hand-sealed, and hand-assembled. I take my time with each piece, and put my best effort into making them look "perfect", and that extra care is worth something.

    Sunday, January 8, 2012

    The Purple Dahlia

    I have so many new ideas to try out on my To-Do list right now, and I finally made the time to try one out today. Months ago I came across this tutorial on Holidash. It's a tutorial for making a felt Dahlia brooch.
    Credit: Megan Reardon

    I really don't mind this flower as a brooch, but I also like the idea of it as a hair accessory and have seen many of these on Etsy. I wasn't making mine today with the intent of adding it to my Etsy shop; I was just experimenting with it and wanted to see if I could do it, (not to mention that I have many sheets of felt hanging around, left over from a project I lost interest in).

    I picked out some purple felt for my flower, mainly because purple is my favorite color, but also because it was one of the few whole sheets of felt I have left over. I am not about to recreate my step-by-step process, as I basically followed the above tutorial to a tee, but I did make a few changes. For one, I did not include the cardboard base because I wanted my flower to be more flexible since it will be sitting on a round surface (unless someone out there has a flat head?). If I were to use this as just a brooch, I would probably include the base.

    Secondly, I used a hot glue gun. This crazy woman used tacky glue and sat around waiting for her 37 petals to dry, twice! I did not have the patience for that. If I can use my glue gun in place of another method, then I will. Here is how mine looked starting out:


    This was a very tedious process of cutting and gluing. It ended up taking me over an hour to finish, and technically it's not even finished yet. If I were to make any more of these, which I'm pretty sure I will, I plan to cut out everything ahead of time (in multiple colors for multiple flowers) and then glue them at another time. I have found that doing things in steps like that makes it seem less tedious. (I usually spend one night cutting out all of my fabric circles/petals for my headbands, then another night gluing them, and finally a third to complete finishing touches, like adding the clips, chains, etc.) Here is how my (nearly) finished flower looks:

    I have not finished the center yet because I have not decided how I want it to look. In the brooch tutorial, the woman, (her name is Megan), used the same red felt for the middle.
    Credit: Megan Reardon

    I can't decide if I want to do that with mine, or add a little extra color instead. I was thinking about a yellow center? Though  suppose, technically, it may not be considered a dahlia anymore... Decision update: I have decided, for this particular one, since I am keeping it for myself, to keep the center purple. I am contemplating attaching it to my fleece scarf (it's concord purple) because I really like how to two purples look together. We will see.

    Overall, I enjoyed making this flower. The tutorial was really easy to follow, but I did find myself trying to keep my perfectionism at bay. (I really wanted to make a cardboard petal template so all of my petals were uniform shapes and sizes, but I held off and ended up winging them). I think I might make a few more of these, their purpose as of yet undetermined. I have some navy blue, pale pink, and turquoise felt that I might use. I think this would also look great in a cream, tan, gray or dare I say, black? :-) (Did you catch that one? A black dahlia? Ha ha ha. Nevermind. You can say it, I'm a dork). It has been brought to my attention that some people may not have understood my vague allusion to the Black Dahlia. So in brief, (Google or Wiki it for more details), the Black Dahlia was the nickname of a woman who was a victim of a brutal murder during the late 40s. Well-known case then, but perhaps no longer now? Unless, of course, you watch American Horror Story, but I knew about it before that and had assumed others knew as well....)

    What do you think of this flower? As a headband? Hair clip? Brooch? Suggestions for the center of my purple dahlia?

    Friday, January 6, 2012

    Attempting to be Professional

    I have been told that one needs a photo box, or light box, to take great professional photos. I have read various advice blogs and articles that claim that photos taken in one these boxes are a must when listing on Etsy. I totally believed them. And I believed that the method for making one was as easy as the directions implied. Here is the one that I made:


    The box is lit from the top, or sides, with the intent of providing enough direct light to minimize shadows and eliminate the need for flash, which I'm told washes out the colors. It took me over an hour to make my attempt at a photo box, (I blame it on the box cutters I was using). What is more frustrating is that using this box hasn't seemed to change my photos for the better at all. Well, I suppose a couple of them look better, but none of the other ones do.

    I'm probably using the wrong light bulb, and I'm sure that it would help if I had more than just one inadequate desk lamp. I tried taking some photos last night (because one woman swears that taking photos in one of these at night will still look as though it was taken during the day- they didn't). They came out really blue looking and dark. So I decided I needed more daylight to make it work, and packed everything away until today.

    I was so hopeful about this that I sat down to re-take my photos today, in the early afternoon because I also read somewhere that photos look best when taken in morning or afternoon light. I took 90 photos (multiple shots of some items) to ensure that at least one photo of each item would look decent. Then my lamp broke before I had even put a dent in photographing my entire inventory, (in its defense, it is old). I gave up trying to fix it and uploaded my photos instead. I am not happy with any of them. They all still look rather dark with too many shadows. And I'm still have a difficult time getting the colors to come through correctly. They are looking washed-out and dull, and for the most part, purples are still appearing more blue. I'm blaming my camera for this one because they look exactly the same on my computer as they do when I review them on me camera. Take a look at how they are turning out (after some slight editing):

    These colors should be hot pink and lime green, but they are rather dull. And the background is not white at all.
    This is SUPPOSED to be a bold, almost fire engine, red!
    Does this look like a deep royal purple to you?


    What am I doing wrong?! Anyone know how to fix this? Tips? Tricks? Anything?

    Sunday, January 1, 2012

    Future items to make?

    I have been tossing around the idea of including rings, earrings, and bracelets to my inventory. One of the reasons is because they will use up my pieces of scrap fabrics that are too small for the regular poms and flowers, but also because I want to add a bigger variety of items to the ones that I already make. These three items also seem to be ones that most women wear more of.

    The rings that I would like to make would be smaller versions of the poms, (think 1" or less), attached to a metal adjustable ring base. I don't have a photo of what they would look like, so you will have to use your imagination to picture it. I have received some positive feedback from some women I spoke with this weekend. One specifially told me that she would DEFINITELY buy a ring if I made those (I am holding her to it!). These would probably be the easiest of the three to make.

    The earrings that I would like to make would look similar to these post earrings made by Jessica over at Happy Together:

    These look easy enough to make, but the fabric circles used for this are only the size of a dime, so they may prove tricky for my clumsy fingers. But I think they are really cute, great for women or girls, and would be an excellent way to use up the tiny fabric scraps I have collected.

    The last project idea is to make fabric button bracelets. I fell in love with the one that is featured in the tutorial over at The Mother Huddle:


    Unfortunately, this would be the most expensive of the pieces to make. The bracelet bases average about $3.00 apiece, and the button kits are also about $3.00, which only includes 10 buttons and the bracelet requires 9. So unless I could ensure that these bracelets would be a popular item and a great seller, then it probably would not even be doable (read: affordable) for me right now. Perhaps if I was working several days a week.... But I do really like them, so they are staying on the top of the possibilities list.

    Opinions? Would you buy any of these items? Do you think one would be a better seller than the others? Which should I attempt first? (Leave a comment or participate in my new polls on the right margin).